Authenticate and manage users is a common task/need for many apps. In this article, we will set up an Amazon Cognito User Pool to use with our iOS App. An easy way to set up an Amazon Cognito User Pool for our app is by using the Amplify Commandline Interface.
Let’s start with some short definitions:
What is an Amazon Cognito User Pool?
Amazon Cognito User Pool is a user directory service. It provides us with many features such as registration, authentication and account recovery.
What is Amplify Command Line Interface?
The Amplify Command line Interface is a command line interface that helps us to create and manage AWS cloud services for our app.
Create a project
Firstly let’s create our iOS project. Open Xcode and create a project.
Install & configure Amplify
- Install the Node.js and npm. (Skip if it is already installed)
- On the command line execute:npm install -g @aws-amplify/cli
- In the command line, navigate to the root folder of the Xcode project.
- On the command line execute: amplify configure. You will be prompted to sign in to the AWS administrator account: https://console.aws.amazon.com/. Tap “Enter” on the command line when you sign in.
- Now you have to specify the AWS Region. Choose the one that is nearest to your users’ location. For example, most of my users are in London so I will select the region eu-west-2
- Specify a name for the new IAM user. Identity and Access Management allow us to access our AWS services and resources securely. Choose a name or tap enter to use the suggested. You will have to tap on the provided link and go to the AWS console to finish the creation of the user. Follow the steps by using the default settings but take note of the accessKeyID and secretAccessKey before you finish the creation. (* The default settings give administrator access to the IAM user. A good practice is to give only the minimum required privileges).
- Enter the accessKeyID and secretAccessKey on the command line
- Now choose a profile. For this example select the default.
- Now, execute: amplify init
- Enter a project name, an environment name, a default editor and choose iOS
- Choose the default profile.
Cocoapods
- Install cocoapods if it is not installed.
- In the command line, navigate to the root folder of the Xcode project.
- execute pod init
- Open the podfile and add the following pods:
123pod 'AWSMobileClient', '~> 2.10.0'pod 'AWSAuthUI', '~> 2.10.0'pod 'AWSUserPoolsSignIn', '~> 2.10.0'
Update amplify & cocoapods
Now, let’s push our changes. In command line execute: amplify push. You should see a result like:
![]()
Now, let’s update our pods in the project. In command line execute: pod install –repo-update
Lastly, let’s drag and drop to our app the awsconfiguration.json file.
Add support for Authentication
In the command line execute: amplify add auth. Then follow the instructions and choose the Default configuration. Choose Email to whatever you prefer the users to use for sign in and don’t configure any advanced settings.
Then execute: amplify push
![]()
Great, all done with the setup.
Register a user through our app.
Before we go jump and use the AWSMobileClient to register our user, we should be careful not to make our code depend directly to the AWSMobileClient SDK. The functionality we want to add is register and sign in. We have to design our code in a way that if we want to stop using the AWS and use another service, the changes to be easy. That’s why we want to create an AuthenticationManager to handle our call. So our code will call AuthenticationManager(which conform to the AuthenticationProtocol) and the AuthenticationManager will be responsible to call the AWSMobileClient to sign in our users. In that way, if we want in the future to replace the AWS with another service all we have to do, is just to create another class that conforms to the AuthenticationProtocol with the new service calls.
|
1 2 3 4 5 6 7 8 9 10 11 12 13 14 15 16 17 18 19 20 21 22 23 24 25 26 27 28 29 30 31 32 33 34 35 36 37 38 39 40 41 42 43 44 45 46 47 48 49 50 51 52 53 54 55 56 57 58 59 60 61 62 63 64 65 66 67 68 69 70 71 72 73 74 75 76 |
// AuthenticationProtocol.swift enum UserState { case signedIn, signedOut, unknow } protocol AuthenticationProtocol { func signIn(navigationController: UINavigationController, completion: @escaping (UserState?, Error?) -> Void) } // AuthenticationManager.swift import AWSMobileClient class AuthenticationManager: AuthenticationProtocol { func signIn(navigationController: UINavigationController, completion: @escaping (UserState?, Error?) -> Void) { AWSMobileClient.sharedInstance().initialize { (userState, error) in if let userState = userState { switch(userState){ case .signedIn: DispatchQueue.main.async { completion(.signedIn, nil) } case .signedOut: AWSMobileClient.sharedInstance().showSignIn(navigationController: navigationController, { (userState, error) in if(error == nil){ DispatchQueue.main.async { completion(.signedIn, nil) print("Logged In") } } }) default: AWSMobileClient.sharedInstance().signOut() } } else if let error = error { print(error.localizedDescription) } completion(.unknow, error) } } } // ViewController.swift import UIKit class ViewController: UIViewController { var authenticationManager: AuthenticationProtocol = AuthenticationManager() override func viewDidLoad() { super.viewDidLoad() // We call it from ViewController only for the sake of demo. We shouldn't have any logic in the ViewControllers signIn() } private func signIn() { guard let navigationController = self.navigationController else { return } authenticationManager.signIn(navigationController: navigationController) { (userState, error) in guard let userState = userState else { return } switch(userState) { case .signedIn : print("") // Handle this case case .signedOut : print("") // Handle this case case .unknow : print("") // Handle this case } } } } |
We shouldn’t have any login logic in any ViewController, but for the sake of the demo, we will leave it there.
Since we need to pass a UINavigationController to the signIn call, let’s go to the storyboard and embed our ViewController to a NaviagtionController.
We are ready to run the app. The first screen we see is the following:
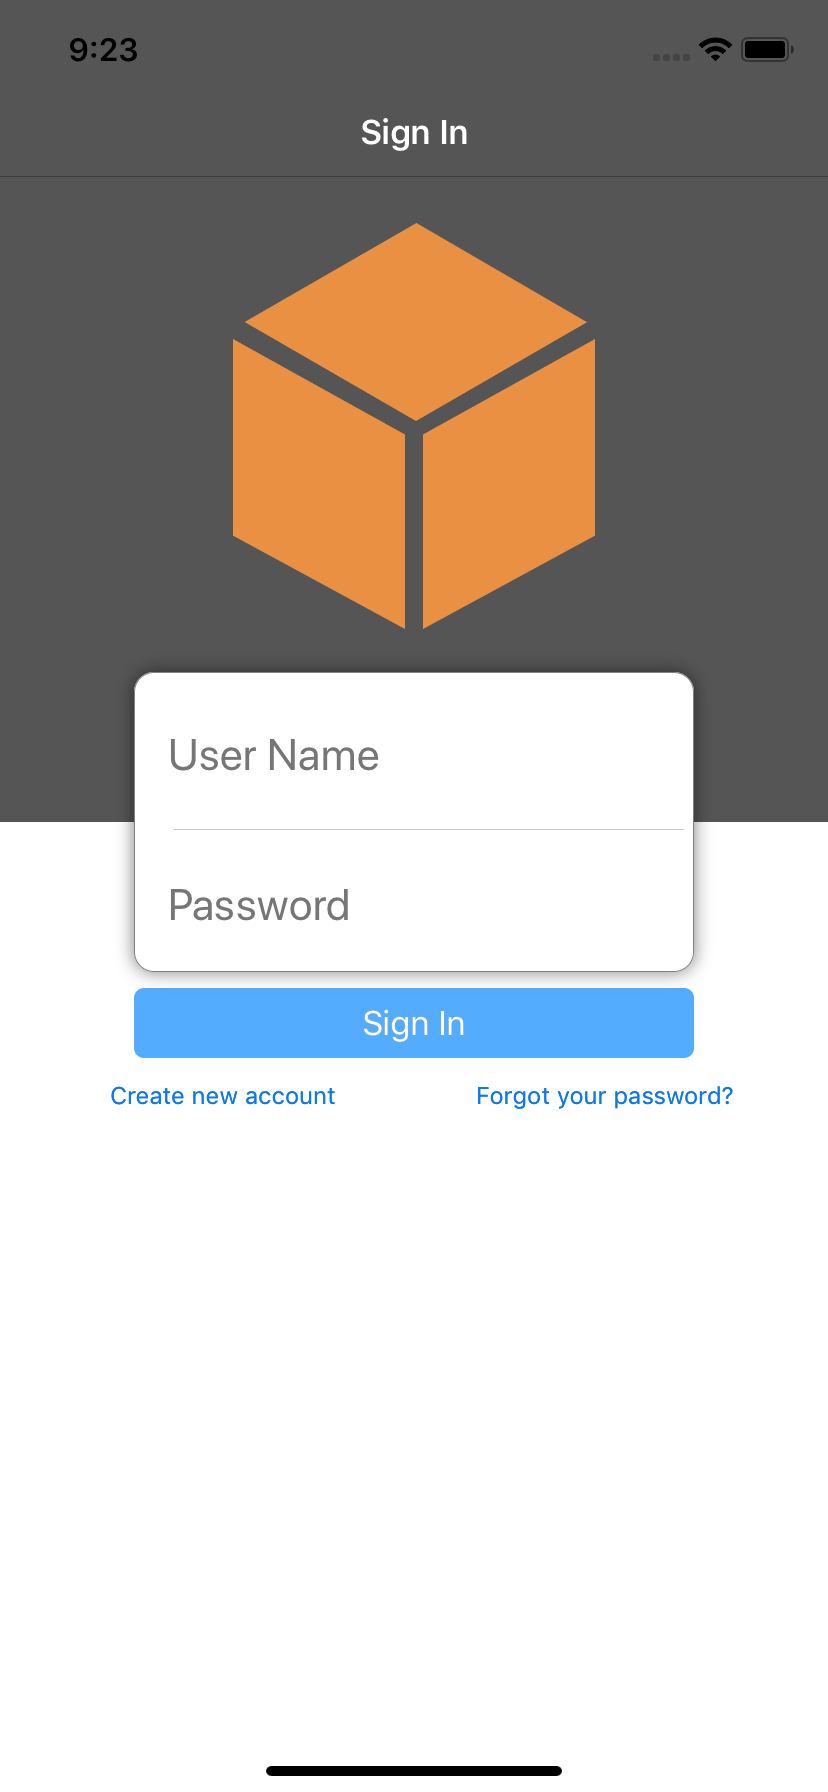
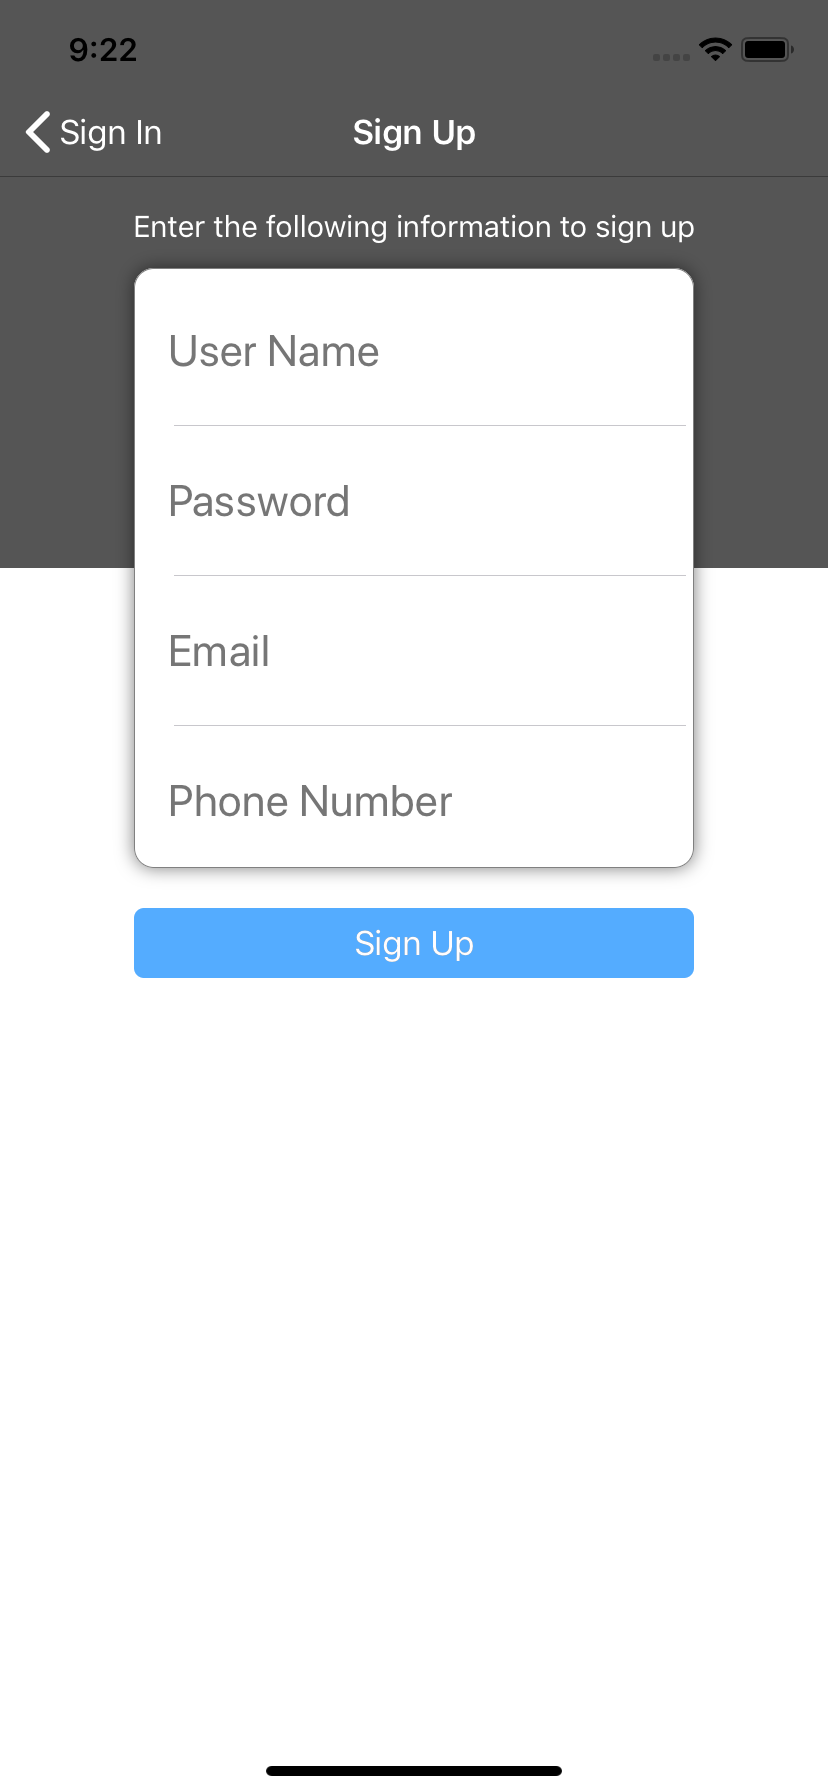
Tap to register a user, and fill in all the required fields.
Then go to your email and complete the registration.
That’s it, we have all the required functionality to sign in a user!
AWS Console
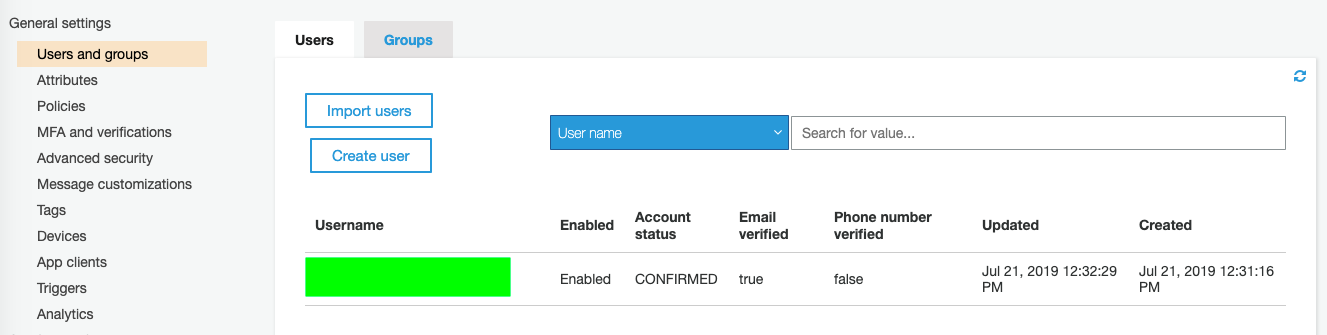
- In our AWS console let’s go to the Icognito and select Manage User Pools.
- Select our iOS app pool name.
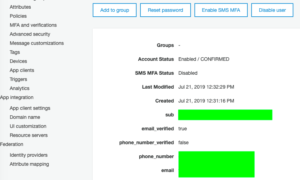
- From the left bar select Users and Groups. We acan see our user:

- Tap on the username to see more details:


