In this article, we will add analytics to an iOS app by using Amplify and PinPoint.
Create a project
Firstly let’s create our iOS project. Open Xcode and create a project. Let’s name it PinPoint.
Install & configure Amplify
- Install the Node.js and npm. (Skip if it is already installed)
- On the command line execute:npm install -g @aws-amplify/cli
- In the command line, navigate to the root folder of the Xcode project.
- On the command line execute: amplify configure. You will be prompted to sign in to the AWS administrator account: https://console.aws.amazon.com/. Tap “Enter” on the command line when you sign in.
- Now you have to specify the AWS Region. Choose the one that is nearest to your users’ location. For example, most of my users are in London so I will select the region eu-west-2
- Specify a name for the new IAM user. Identity and Access Management allow us to access our AWS services and resources securely. Choose a name or tap enter to use the suggested. You will have to tap on the provided link and go to the AWS console to finish the creation of the user. Follow the steps by using the default settings but take note of the accessKeyID and secretAccessKey before you finish the creation. (* The default settings give administrator access to the IAM user. A good practice is to give only the minimum required privileges).
- Enter the accessKeyID and secretAccessKey on the command line
- Now choose a profile. For this example select the default.
- Now, execute: amplify init
- Enter a project name, an environment name, a default editor and choose iOS
- Choose the default profile.
Cocoapods
- Install cocoapods if it is not installed.
- In the command line, navigate to the root folder of the Xcode project.
- execute pod init
- Open the podfile and add the following pods:
|
1 2 3 4 5 6 7 8 9 10 11 12 13 14 15 16 17 |
# Uncomment the next line to define a global platform for your project platform :ios, '10.0' target 'AWSAuthentication' do # Comment the next line if you're not using Swift and don't want to use dynamic frameworks use_frameworks! # Pods for AWSAuthentication pod 'AWSMobileClient', '~> 2.9.0' pod 'AWSPinpoint', '~> 2.9.0' target 'AWSAuthenticationTests' do inherit! :search_paths # Pods for testing end end |
Update amplify & cocoapods
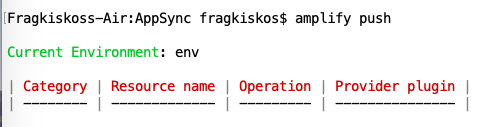
Now, let’s push our changes. In command line execute: amplify push. You should see a result like:
Now, let’s update our pods in the project. In command line execute: pod install –repo-update
Open the .xcworkspace file, and let’s drag and drop to our app the awsconfiguration.json file.
Add analytics
In teh command line execute: amplify add analytics
Then provide a resource and allow guests to send analytics.
Then execute: amplify push

Add the AnalyticsManager
Let’ s create the AnalyticsManager:
|
1 2 3 4 5 6 7 8 9 10 11 12 13 14 15 16 17 18 19 20 21 22 23 24 25 26 27 28 29 30 31 32 33 34 35 36 37 38 39 40 |
// AuthenticationAnalytics.swift protocol AuthenticationAnalytics { func didTapSignIn() } // AnalyticsManager.swift import AWSPinpoint class AnalyticsManager { private var pinpoint: AWSPinpoint? init(launchOptions: [UIApplication.LaunchOptionsKey: Any]?) { let pinpointConfiguration = AWSPinpointConfiguration.defaultPinpointConfiguration(launchOptions: launchOptions) pinpoint = AWSPinpoint(configuration: pinpointConfiguration) } func logEvent(name: String, attributes: [String : String], metrics: [String : NSNumber]) { if let analyticsClient = pinpoint?.analyticsClient { let event = analyticsClient.createEvent(withEventType: name) for attribute in attributes { event.addAttribute(attribute.value, forKey: attribute.key) } for metric in metrics { event.addMetric(metric.value, forKey: metric.key) } analyticsClient.record(event) analyticsClient.submitEvents() } } } extension AnalyticsManager: AuthenticationAnalytics { func didTapSignIn() { logEvent(name: "SignInButton", attributes: [:], metrics: [:]) } } |
Now let’s use the AnalyticsManager.
First let’s add a sign in UIButton in the ViewController. Also add a didTapSignIn IBAction from the button to the ViewController.
Inside the ViewController all we have to do is:
|
1 2 3 4 5 6 7 8 9 |
var analytics: AuthenticationAnalytics? override func viewDidLoad() { super.viewDidLoad() } @IBAction func didTapSignIn(_ sender: Any) { analytics?.didTapSignIn() } |
Lastly, let’s create AnalyticsManager in the AppDelegate and pass it to the ViewController.
|
1 2 3 4 5 6 7 8 9 10 11 12 13 14 15 16 17 18 19 20 21 22 23 |
import UIKit import AWSPinpoint @UIApplicationMain class AppDelegate: UIResponder, UIApplicationDelegate { var window: UIWindow? private var analyticsManager: AnalyticsManager? func application(_ application: UIApplication, didFinishLaunchingWithOptions launchOptions: [UIApplication.LaunchOptionsKey: Any]?) -> Bool { guard let vc = self.window?.rootViewController as? ViewController else { return true } analyticsManager = AnalyticsManager(launchOptions: launchOptions) vc.analytics = analyticsManager return true } } |
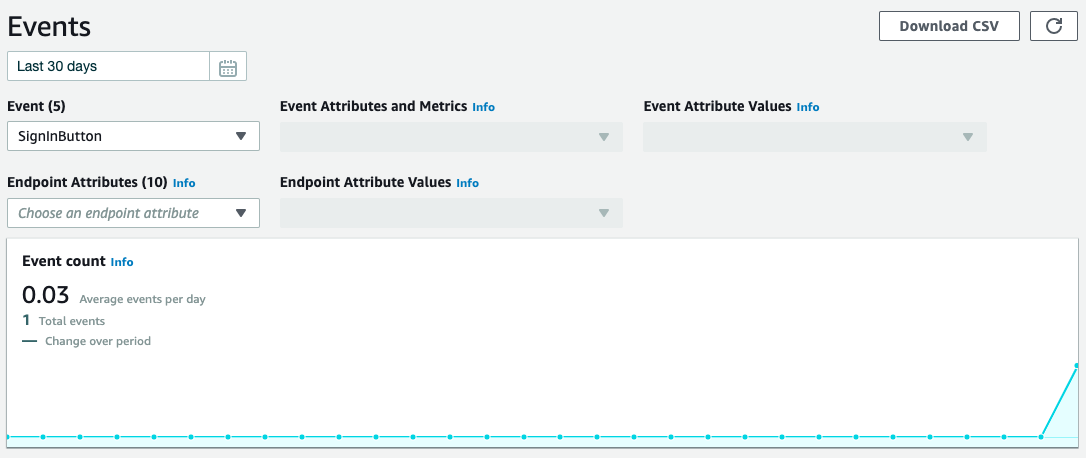
Let’s run the app and tap the sign in button.
Now if we open the PinPoint from the AWS console, we can see our events:


