Why linting is important:
Linting tools as SwiftLint do static analysis in our code. They will produce warnings or errors if they find that the code does not follow a predefined set of rules.
Linting tools can:
1. Prevent bad practices, such as forced unwrapping
2. Improve the codebase style. All the project will follow the same style rules and that not only enhance readability but also removes potential conflicts amove engineers.
3. Help engineers focus on reviewing the actual code inside a pull request.
4. Help new team member learn the project style rules faster.
How to install SwiftLint:
The two most common ways to use SwiftLint in an iOS app is either installing it through cocoapods or installing it through Homebrew.
Installing it through cocoapods is a simple as adding the pod : pod ‘SwiftLint‘
into your podfile.
In this article, we will install SwiftLint through Homebrew:
- Open the terminal and navigate to the root folder of your project
- Execute: brew install swiftlint
Let’s build first our project to see how many errors and warnings we have:
![]()
Great, currently we have 0 errors and zero warnings.
Now let’s add a new script in our project to run the swiftLint when we are building the project.
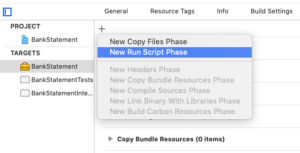
- Navigate to the build phases of the main target:

- Tap on the plus button to create a new run script:
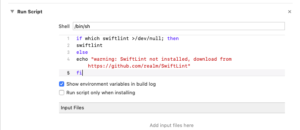
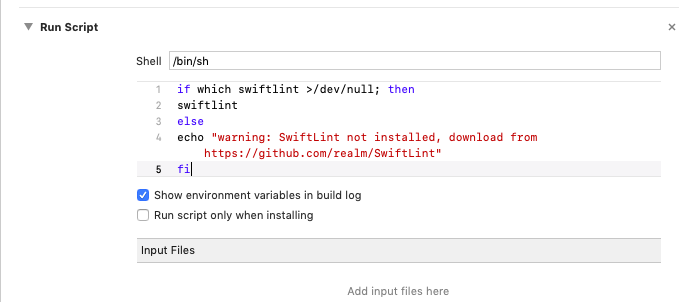
- Add the following lines inside the script:
12345if which swiftlint >/dev/null; thenswiftlintelseecho "warning: SwiftLint not installed, download from https://github.com/realm/SwiftLint"fi
- Now, let’s build the project. The project fails to compile. There are 37 warnings and 2 errors:

- An easy way to fix the majority of the warning is to execute on the command line: swiftlint autocorrect. Let’s build again the project. Now we are having 3 warnings and 2 error.


Disable and add custom Rules
If we look at the warnings and the errors, we will see that they are violating some SwiftLint rules. In order to configure the rules of SwiftLint we have to create a swiftlint.yml file. In the terminal execute:
touch .swiftlint.yml
Disable Rules
For disabling a rule we have two options.
A. Disable a rule for a single case:
![]()
All we have to do is add: // swiftlint:disable ruleName
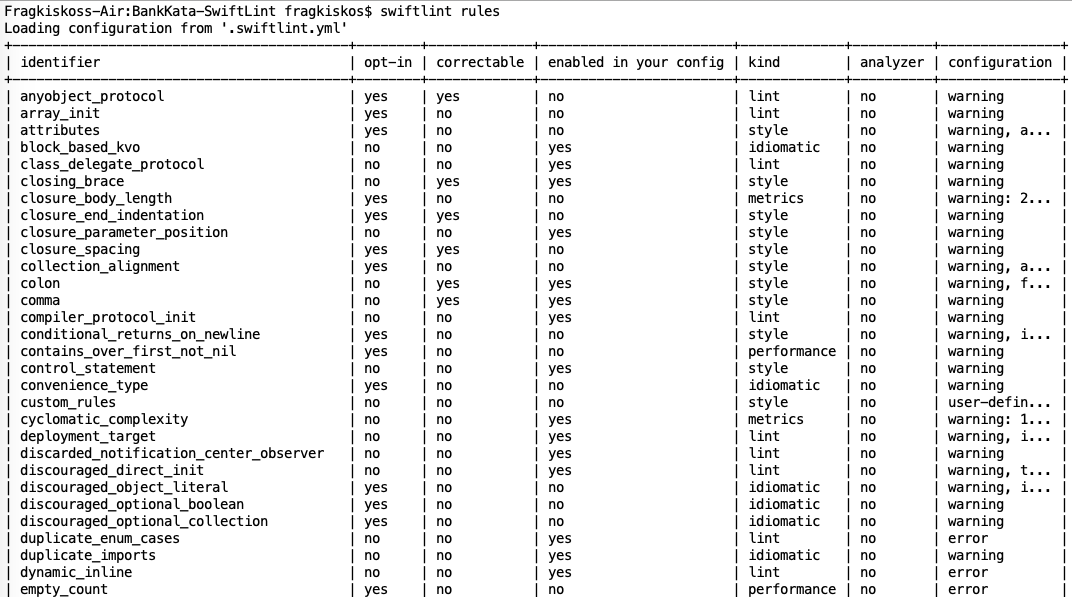
To find the name of the rules you can type in the terminal: swiftlint rules
B. Disable a rule for the whole project:
Open the swiftlint.yml and add the following:
|
1 2 |
disabled_rules: - line_length |
Custom Rules
We can create our own rules if we like. Let’s add a rule that will throw an error if we use fatalError. Open the swiftlint.yml and add the following:
|
1 2 3 4 5 |
custom_rules: no_fatal_errors: name: "Don't use fatalError()" regex: "fatalError" severity: error |
Exclude files
Some times we need to use cocoapods or carthage to add new functionality in our project. In order to avoid SwiftLint check this files we can open the swiftlint.yml file and add:
|
1 2 3 |
excluded: - Carthage - Pods |
How to introduce swiftLint in an existing project:
Trying to use SwiftLint in an existing project can cause a lot of warnings and errors. The strategy I normally follow is:
- Execute swiftlint autocorrect to fix as many warnings as possible
- Disable all rules initially, and try to introduce one rules at a time.
Source code:
https://github.com/Fragki/SwiftLint-Example
Resources:
https://github.com/realm/SwiftLint#installation


