In this article we will cover the following:
- What is an acceptance test
- What is FitNesse and how it works
- How to setup FitNesse for an iOS project
- Link to the code
- Additional resources
-
What is an Acceptance Test?
Acceptance tests are tests that validate whether software works correctly. The term is often used interchangeably with the phrase functional tests or behaviour-driven development.
There can be high-level Acceptance Tests (through the User Interface) or low-level (through the controller objects).
Low-level acceptance tests have a lot of benefits, for example, they are independent of UI changes and most importantly they are more robust than high-level Acceptance Tests as using a simulator can often be flaky.
2. What is FitNesse and how it works
FitNesse is a tool for specifying and verifying application acceptance criteria. It acts as a bridge between the different stakeholders (disciplines) in a software delivery process. Its wiki server makes it easy to document the software. It’s test execution capabilities allow you to verify the documentation against the software, ensuring the documentation remains up to date and the software is not facing regression.
FitNesse is operating at a level just below the user interface level. It is essentially another alternative UI. The main purpose of FitNess is that the business logic of the software works as expected, independently of the user interface we plug to it.
FitNesse is a wiki that takes inputs and passes them to the Test System. FitNesse can provide two Test Systems; the Fit and the Slim. The slim has various implementations for different languages. In this article, we will use the OCSlimProject (https://github.com/paulstringer/OCSlimProject) from Paul Stringer.
In order to test our business logic, we have to create a Fixture which from one side will serve as an alternative UI and from the other side will communicate with the Slim.
How to setup FitNesse for an iOS project
Let’s now create an iOS project and make it communicate with the FitNesse.
The following must be installed/setup before we can begin with the step by step guide:
- CocoaPods
- Java 1.8
- Node Js
- ios-sim
STEP 1:
Create a new project and give it a name.
STEP 2:
We now need to install the FitNesse templates.
You can download them from the following URL: https://github.com/paulstringer/OCSlimProjectXcodeTemplates. Then run make. The templates should now be ready to be used.
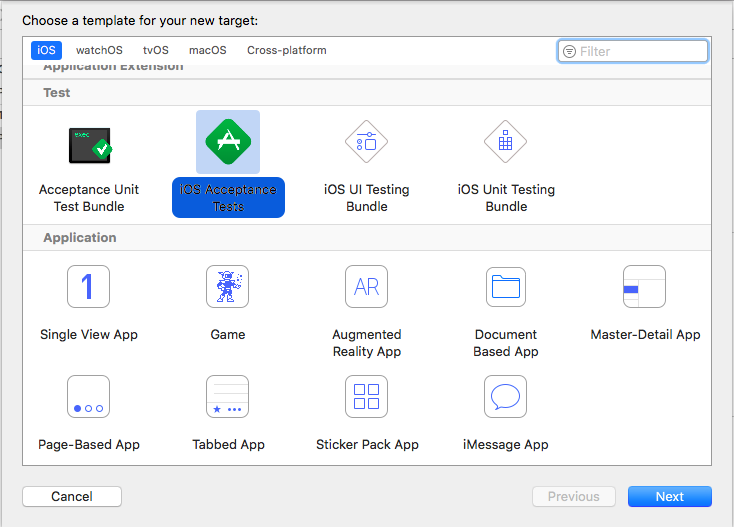
STEP 3:
You should now create a new Target by using the FitNesse template. I suggest giving it the name AcceptanceTests.
STEP 4:
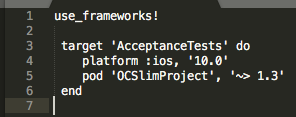
As we are using CocoaPods, we should now create a pod file.
STEP 5:
Open the pod file and add the following:
STEP 6:
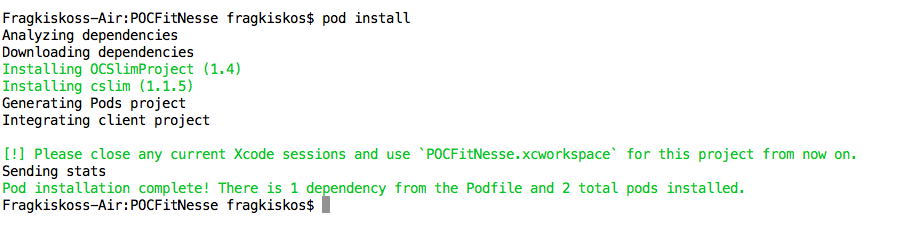
In the terminal run pod install (as usual when we use CocoaPods)
STEP 7:
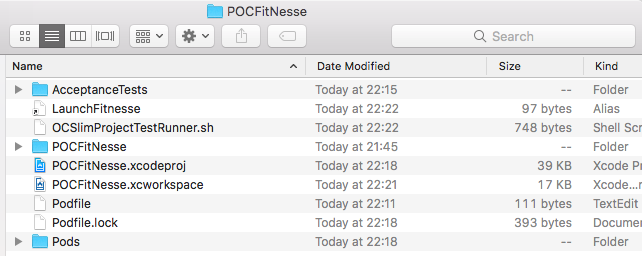
Now close the Xcode and make sure you open the .xcworkspace file
STEP 8:
Select the AcceptanceTests target and run the project.
The project should compile and run with no errors.
Also, a file with the name ./LaunchFitnesse should be created.
STEP 9:
Now let’s run ./LaunchFitnesse. This will open FitNesse in the browser.
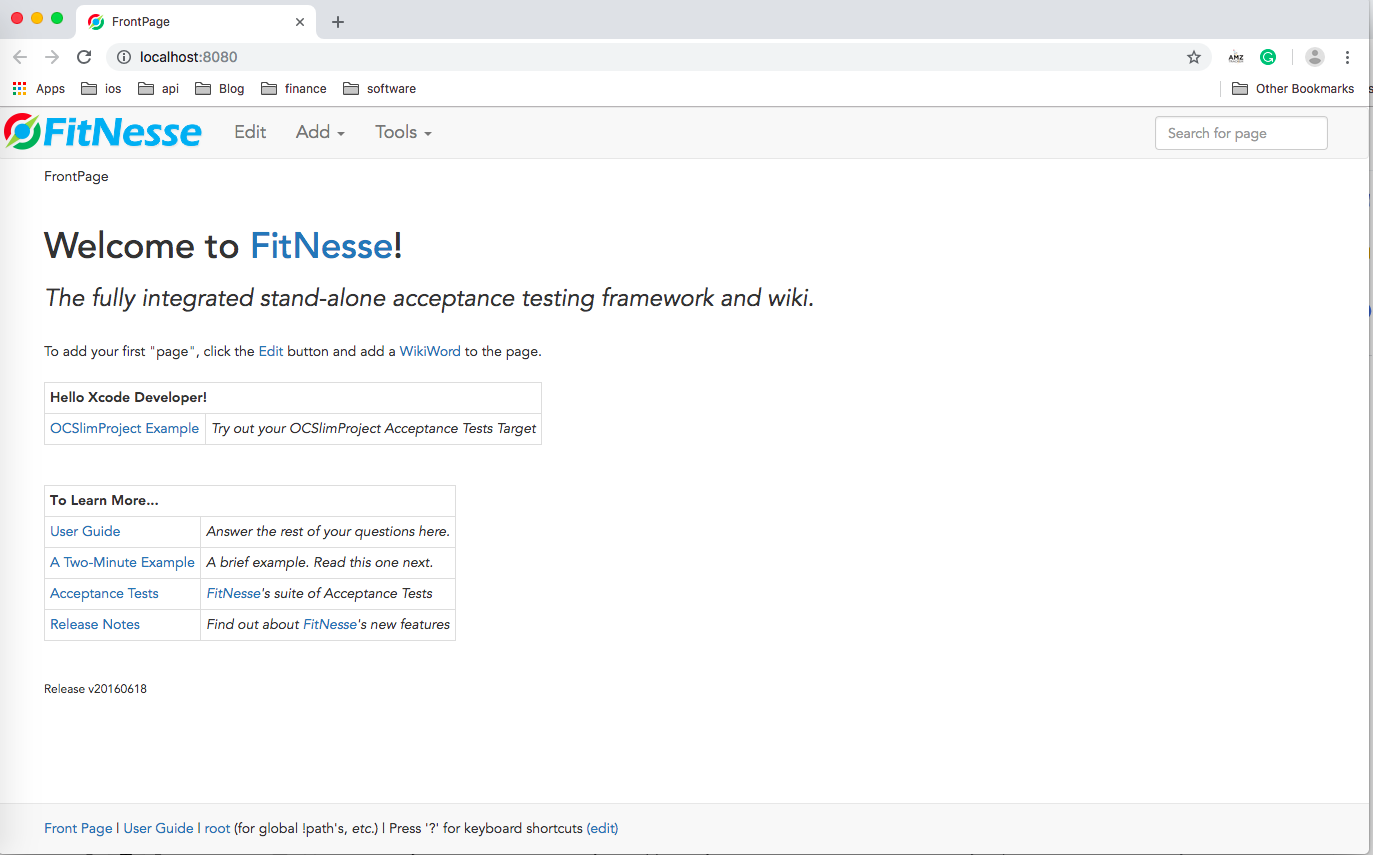
STEP 10:
Now tap on the “OCSlimProject Example”. This will navigate us to our Test Suite which currently only holds one Test Page.
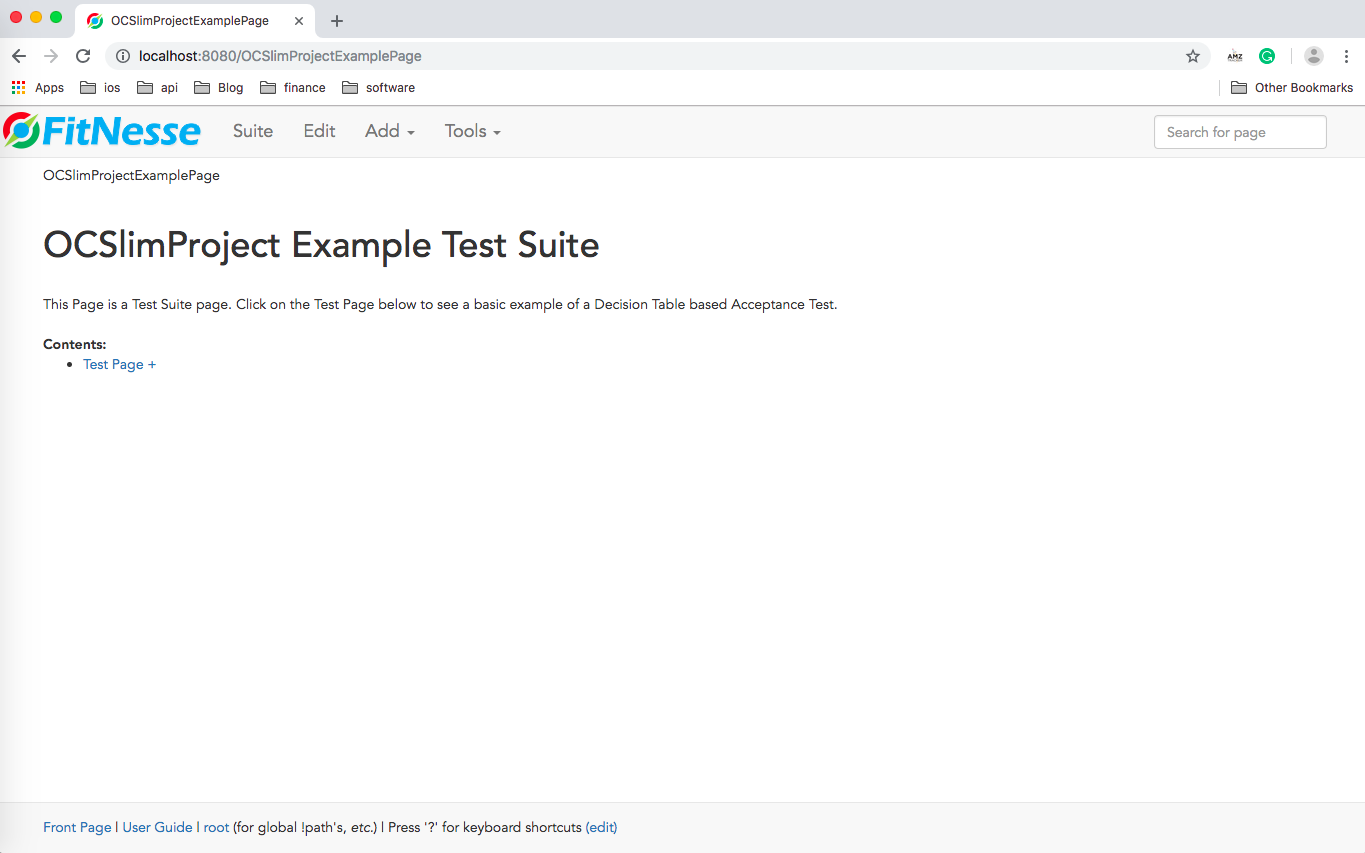
STEP 11:
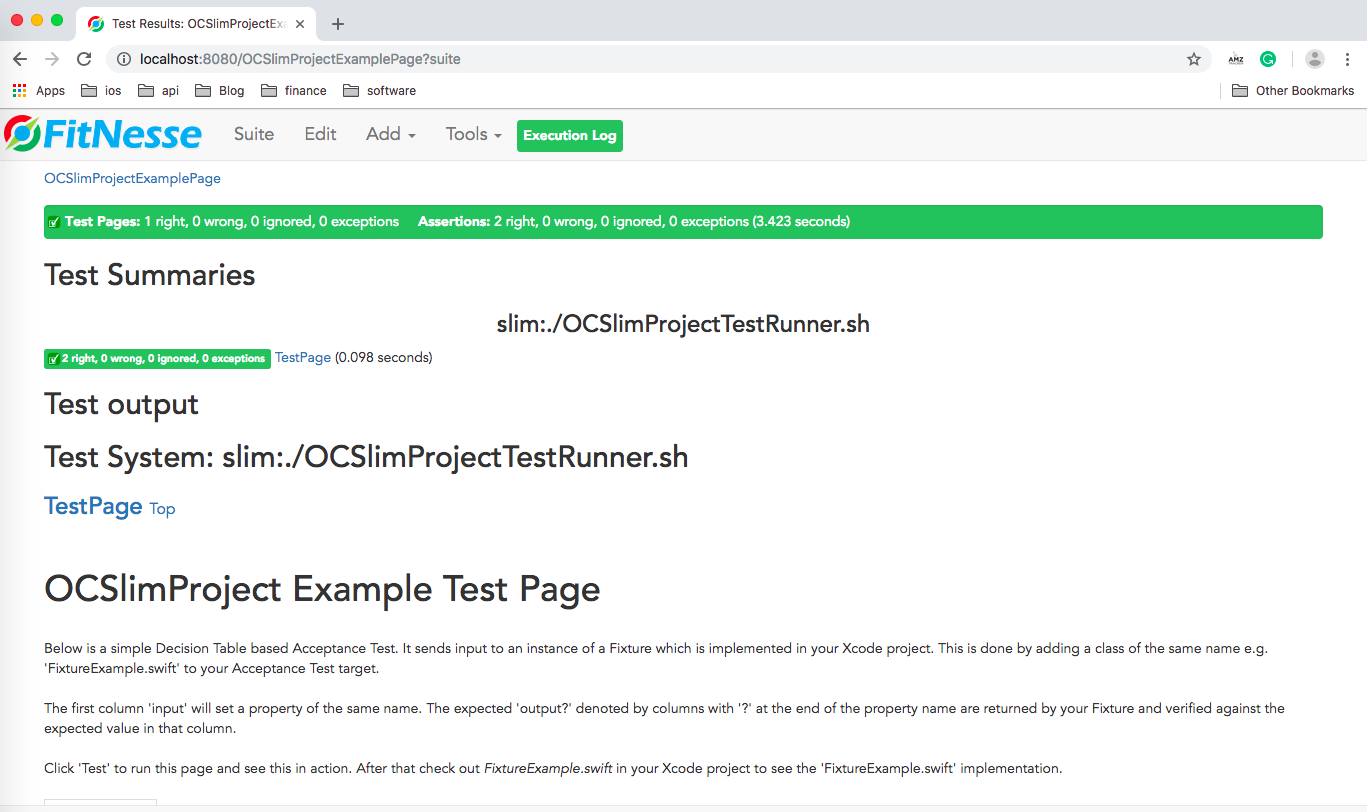
From here we can run the whole Test Suite. Firstly, tap on the top left button labelled “Suite”.
You will be required to wait a bit the simulator to launch and run.
STEP 12:
Now let’s navigate back to our Test Suite page. From here, tap on an individual Test page. Tap on the “Test Page +”. This should navigate you to the specific Test Page.
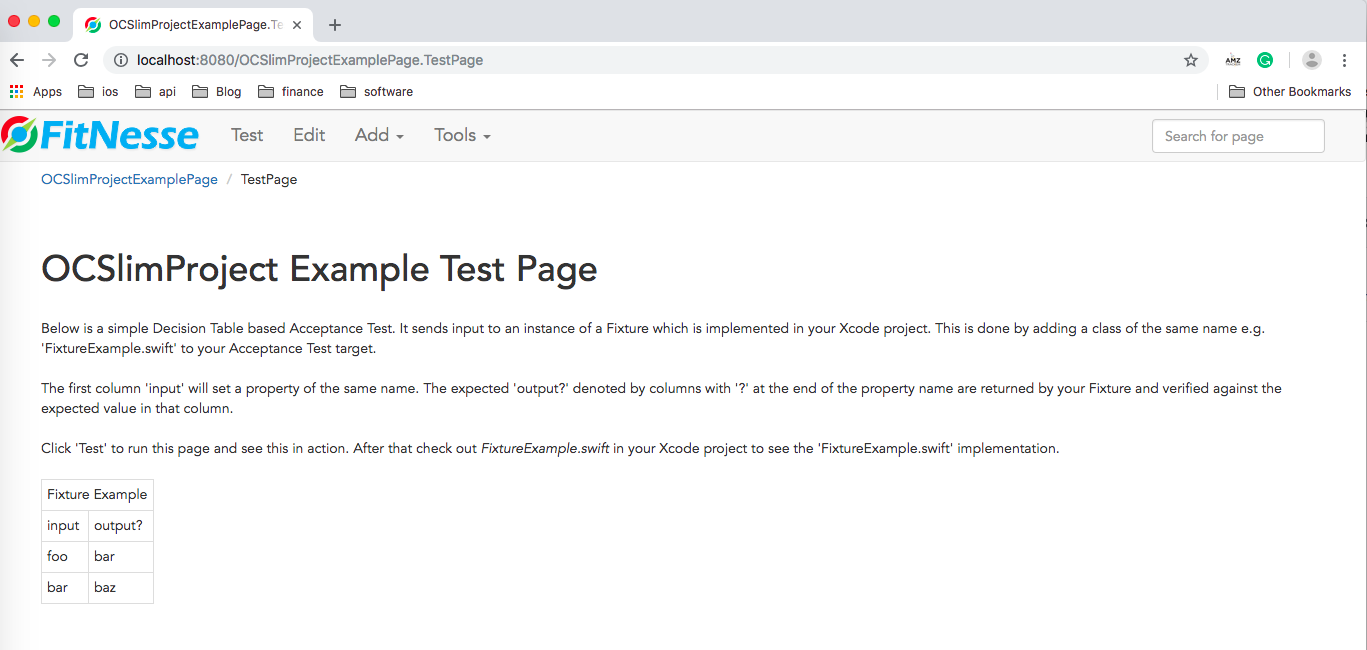
STEP 13:
Tap on the top left button “Test” to run the tests from this Test Page.
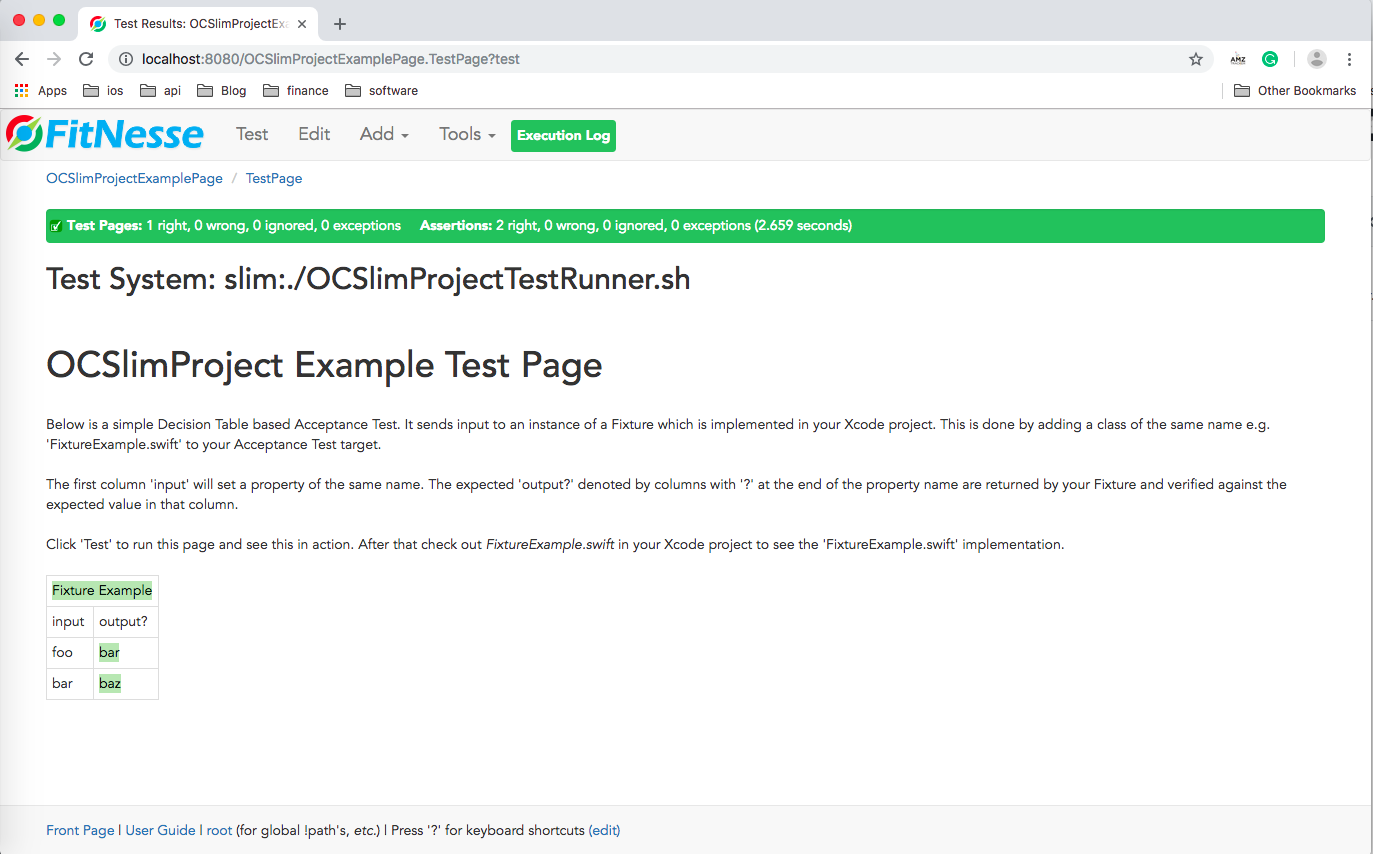
But where does the following data comes from?
In our project, let’s open the file FixtureExample.swift :
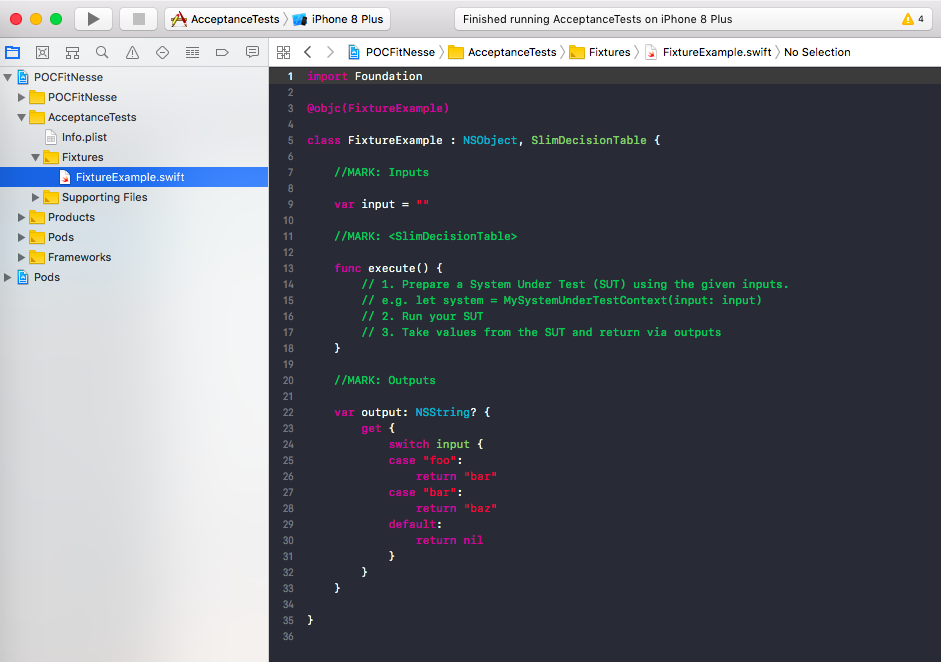
Here we can see that the Fixture Example text from the texted is related to the FixtureExample Swift class. The input text in the table is our variable named input and the output text in the table is our variable output. We use “?” to mark it as the expected output.
You can try to get a red build by changing any of these values in the code.
Link to the code:
https://github.com/Fragki/FitNesse-iOS-Setup
Resources:
https://martinfowler.com/articles/practical-test-pyramid.html
http://fitnesse.org/FitNesse.UserGuide
https://github.com/paulstringer/OCSlimProject
https://academy.realm.io/posts/acceptance-testing/
Paid:
https://cleancoders.com/episode/clean-code-episode-35/show
https://cleancoders.com/episode/clean-code-episode-36/show
https://cleancoders.com/episode/clean-code-episode-37/show


