In this article, we will use the AppSync framework to fetch and create data for our iOS app.
By using AppSync we can build data-driven apps with real-time and offline capabilities.
Create a project
Firstly let’s create our iOS project. Open Xcode and create a project. Let’s name it AppSync.
Install & configure Amplify
- Install the Node.js and npm. (Skip if it is already installed)
- On the command line execute:npm install -g @aws-amplify/cli
- In the command line, navigate to the root folder of the Xcode project.
- On the command line execute: amplify configure. You will be prompted to sign in to the AWS administrator account: https://console.aws.amazon.com/. Tap “Enter” on the command line when you sign in.
- Now you have to specify the AWS Region. Choose the one that is nearest to your users’ location. For example, most of my users are in London so I will select the region eu-west-2
- Specify a name for the new IAM user. Identity and Access Management allow us to access our AWS services and resources securely. Choose a name or tap enter to use the suggested. You will have to tap on the provided link and go to the AWS console to finish the creation of the user. Follow the steps by using the default settings but take note of the accessKeyID and secretAccessKey before you finish the creation. (* The default settings give administrator access to the IAM user. A good practice is to give only the minimum required privileges).
- Enter the accessKeyID and secretAccessKey on the command line
- Now choose a profile. For this example select the default.
- Now, execute: amplify init
- Enter a project name, an environment name, a default editor and choose iOS
- Choose the default profile.
Cocoapods
- Install cocoapods if it is not installed.
- In the command line, navigate to the root folder of the Xcode project.
- execute pod init
- Open the podfile and add the following pods:
1pod 'AWSMobileClient', '~> 2.9.0' <br> pod 'AWSUserPoolsSignIn', '~> 2.9.0'<br> pod 'AWSAppSync', '~> 2.14.0'
Update amplify & cocoapods
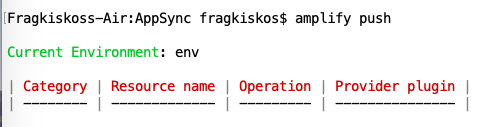
Now, let’s push our changes. In command line execute: amplify push. You should see a result like:
Now, let’s update our pods in the project. In command line execute: pod install –repo-update
Lastly, let’s drag and drop to our app the awsconfiguration.json file.
Add support for Authentication
In the command line execute: amplify add auth. Then follow the instructions and choose the Default configuration. Choose whatever you prefer the users to use for sign in and don’t configure any advanced settings.
Then execute: amplify push

Enter yes to continue.
Great, all done with the setup.
Add Appsync support
In the command line execute: amplify add api
Then choose GraphQL and provide an API name. As authorization type choose Amazon Cognito User Pool. Choose that we don’t have an annotated GraphQL schema and select the guided schema creation. Lastly, choose Single object with fields and type yes to edit the schema
In the schema we see the following model:
|
1 2 3 4 5 |
type Todo @model { id: ID! name: String! description: String } |
Now, let’s execute: amplify push

And select Yes to continue.
Now select to automatically generate GraphQL code for our API. Select the default file name pattern and also select to generate/update all possible GRaphQL operations. Select 2 as the maximum statement depth and API.swift as the file name of the generated code:

Drag the API.swift file into the project.
The API.swift file contains all the code for creating and fetching data.
Let’s try to set it up in the ViewController. In production code we should not put all this code in a ViewController, instead, we can follow a more modular approach as the example: http://trikalabs.com/aws-build-an-authentication-feature-with-clean-architecture/
|
1 2 3 4 5 6 7 8 9 10 11 12 13 14 15 16 17 18 19 20 21 22 23 24 25 26 27 28 29 30 31 32 33 34 35 36 37 38 39 40 41 42 43 44 45 46 47 48 49 50 51 52 53 54 55 56 57 58 59 60 61 62 63 64 65 66 67 68 69 70 71 72 73 74 75 76 77 78 79 80 81 82 83 84 85 86 87 88 89 90 91 92 93 |
import UIKit import AWSAppSync import AWSMobileClient class ViewController: UIViewController { private var appSyncClient: AWSAppSyncClient? override func viewDidLoad() { super.viewDidLoad() setupAppSync() } func setupAppSync() { do { // You can choose the directory in which AppSync stores its persistent cache databases let cacheConfiguration = try AWSAppSyncCacheConfiguration() // Initialize the AWS AppSync configuration let appSyncConfig = try AWSAppSyncClientConfiguration(appSyncServiceConfig: AWSAppSyncServiceConfig(), userPoolsAuthProvider: { class MyCognitoUserPoolsAuthProvider : AWSCognitoUserPoolsAuthProviderAsync { func getLatestAuthToken(_ callback: @escaping (String?, Error?) -> Void) { AWSMobileClient.sharedInstance().getTokens { (tokens, error) in if error != nil { callback(nil, error) } else { callback(tokens?.idToken?.tokenString, nil) } } } } return MyCognitoUserPoolsAuthProvider()}(), cacheConfiguration: cacheConfiguration) // Initialize the AWS AppSync client appSyncClient = try AWSAppSyncClient(appSyncConfig: appSyncConfig) } catch { print("Error initializing appsync client. \(error)") } save() } func save() { let temporaryLocalID = "TEMP-\(UUID().uuidString)" let input = CreateTodoInput(id: temporaryLocalID, name: "a name", description: "desc") let addEventMutation = CreateTodoMutation(input: input) appSyncClient?.perform(mutation: addEventMutation, optimisticUpdate: { transaction in do { // Update our normalized local store immediately for a responsive UI. try transaction?.update(query: ListTodosQuery()) { (data: inout ListTodosQuery.Data) in let i = ListTodosQuery.Data.ListTodo.Item.init(id: temporaryLocalID, name: input.name, description: input.description) data.listTodos?.items?.append(i) } } catch { print("Error updating the cache with optimistic response: \(error)") } }) { [weak self] (result, error) in guard error == nil else { print("Error occurred posting a new item: \(error!.localizedDescription )") return } guard let createResponce = result?.data?.createTodo else { print("Result unexpectedly nil posting a new item") return } print("New item returned from server and stored in local cache, server-provided id: \(createResponce.id)") let newItem = ListTodosQuery.Data.ListTodo.Item(id: createResponce.id, name: createResponce.name, description: createResponce.description) _ = self?.appSyncClient?.store?.withinReadWriteTransaction(){ transaction in try transaction.update(query: ListTodosQuery()) { (data: inout ListTodosQuery.Data) in guard data.listTodos != nil else { return } var updatedItems = data.listTodos?.items?.filter({ $0?.id != temporaryLocalID }) updatedItems?.append(newItem) data.listTodos?.items = updatedItems } } } } } |
If we try to run our code, we notice that we are unable to save our todo item. “Error occurred posting a new item: Failed to authenticate request. Error: notSignedIn(message: “User is not signed in, please sign in to use this API.”)”
The reason is that we have to authenticate our user first. Let’s do it by creating the AuthenticationManager (for more details: http://trikalabs.com/aws-integrating-user-pools-for-ios-apps/).

Also, let’s open the storyboard and embed the UIViewController in a UINavigationController:

Also let’s add a UIButton, and create a didTapSignIn IBAction:

Now let’s add the following code, to enable users to register and sign in:
|
1 2 3 4 5 6 7 8 9 10 11 |
let authenticationManager = AuthenticationManager() @IBAction func didTapSignIn(_ sender: Any) { guard let navigationController = self.navigationController else { return } authenticationManager.signIn(navigationController: navigationController) { [weak self] (userState, error) in if userState == UserState.signedIn { self?.save() } } } |
Now we can delete the save() call from the setupAppSync method.
Let’s test that everything is working as expected.
- Run the app
- Tap on the sign in button
- Register a user
- Open your email and enter the confirmation code
- Go to the AWS console
- Go to DynamoDB and open the table and check that our todo item is created:

If you want to have a look at how to support real-time data with subscriptions check the following article: http://trikalabs.com/aws-appsync-real-time-data-with-subscriptions/
Resources:
https://aws-amplify.github.io/docs/ios/api
https://github.com/aws-samples/aws-mobile-appsync-events-starter-ios


